Photo by Hailey Helper
Creating your first article
Articles are the basic communication unit in Hail- you can think of them like the building blocks for your publications, portal and website. So the first thing to get to grips with is creating an article…
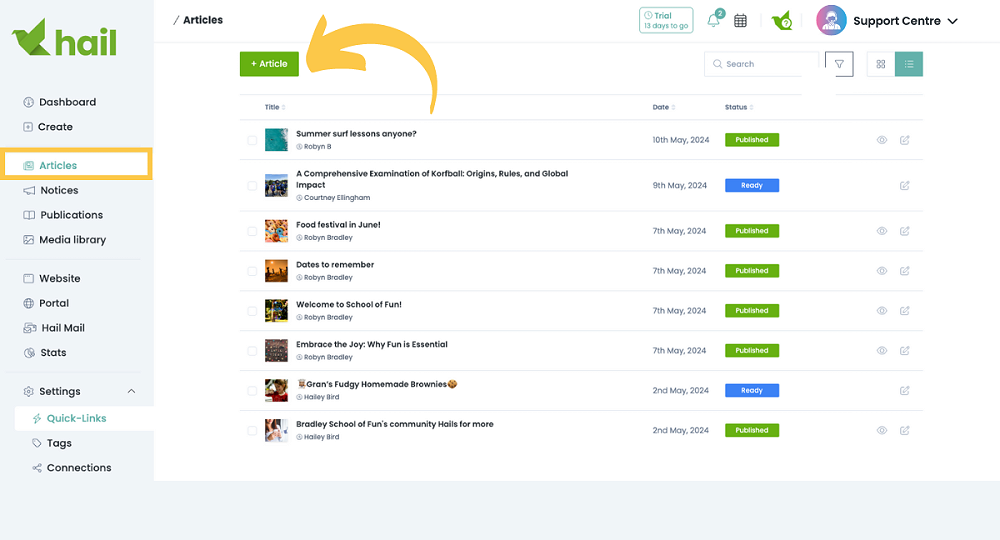
- Head to the Articles section and here you’re presented with the Article Library which defaults to listing your created articles, with the latest at the top and oldest at the bottom. (We’ll explore the article library in a later section).
- For now simply click on + Article at the top.
- You’ll find yourself on a blank Draft article and all you need to do is start filling it in.
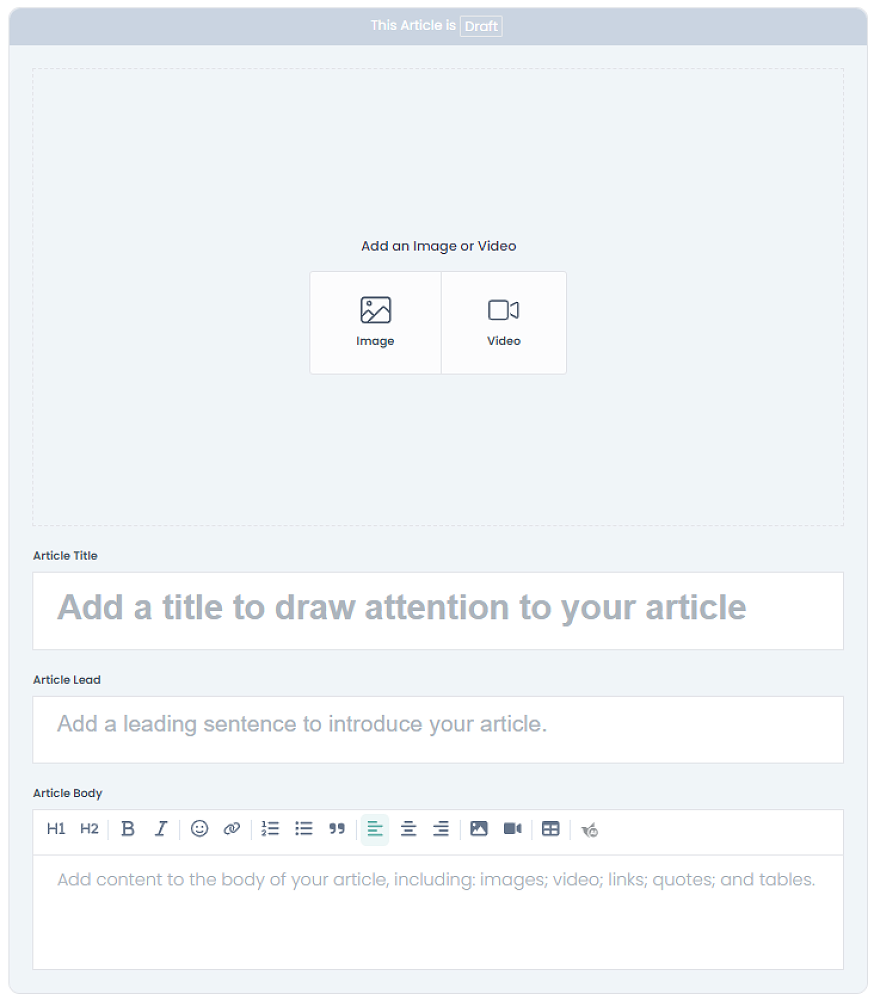
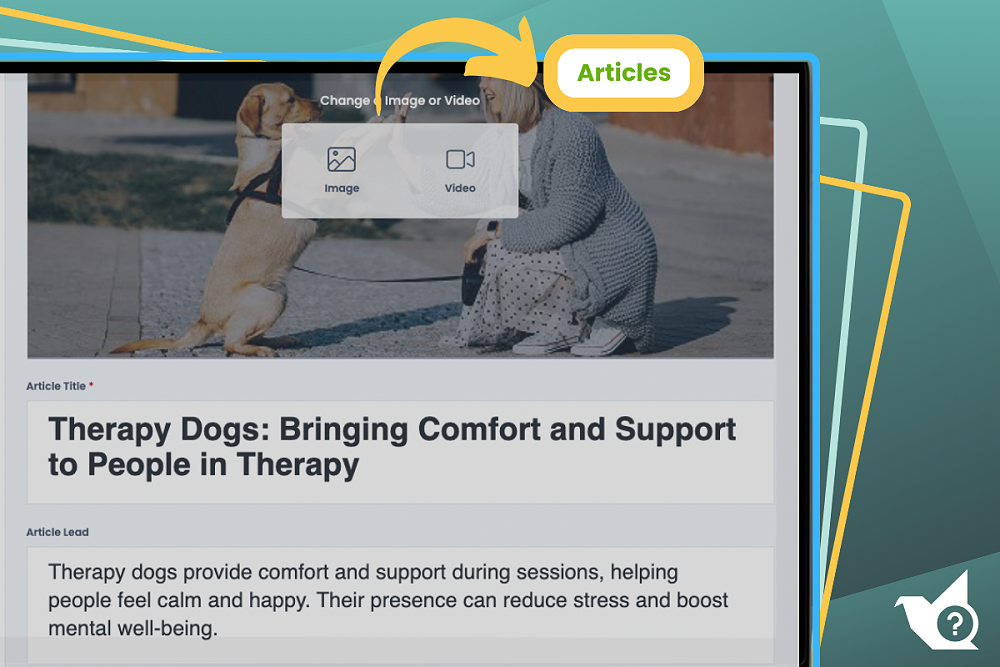
- Let's start with adding media to your first section. This will be the banner of your article. You have 3 choices! Add your own image, video or add a free stock image. Click on the Image icon to add your own image or to import a stock image, or click on Video to add a video.
- Under the feature image or video is the first empty text block for the Article Title. As indicated by the large placeholder text, the title is used 'to draw attention to your article’. Simply click into this section and begin typing. For example: Get Ready for the Outdoor Retreat, then click the Save button.
- Next click into and type your Article Lead. This is the article's introductory, or leading sentence. An effective lead is a brief, sharp statement of the article's essential facts and is ideally 20–25 words in length. For example: Read all about next week’s retreat and what you should be bringing with you. Just to be safe, click Save again.
- Now the main section of your story should be added to the Article Body section. For the above retreat example this is where you’d add all the details such as: leaving and returning dates, emergency contacts, wet weather/postponement arrangements and the list of items for attendees to pack. In the Article Body section you can format the text with bold, italics, links, headers, quotes and lists by simply highlighting the text you wish to format and clicking on the green buttons that appear. You can also add tables into this section.
- Adding images and videos in the body of your article is as easy as you'd wish for: Simply click the Image or Video icon from the formatting bar across the top of your Article Body, select which media you'd like, resize if necessary and voilà!
- Great! Now your story has been correctly entered into the three text sections: Title, Lead and Body. Getting used to dividing your text into these sections will make all the difference later and means your article is correctly formatted for all future uses and will display beautifully wherever it’s published.
- You can also add photos or videos to the gallery, these will appear at the bottom of an article and are useful for when you have a lot of images from an event etc.
- You can attach documents to articles, which will be displayed at the bottom of your text and above any photo galleries when published. The following file types are accepted: Microsoft Word, Excel, Powerpoint, PDFs and MP3s.
📺 See the video below for a walkthrough of creating an article
Need some help creating an article or getting it started? Check out Hail assist!